How to Manage Leads in BidEngine


BidEngine combines fast roof measurements with a CRM-like workflow so you can move a project from lead → estimate → signed deal → invoice in one place. To get the most value from the Leads system, it’s important to understand how leads, measurements, proposals, and invoices all work together as a project progresses.
This guide walks you through:
- Where Leads live in BidEngine
- How to create and edit Leads
- How to leave notes on Leads
- How to generate invoices for Leads
What Is a Lead in BidEngine?
In BidEngine, a Lead represents a single project at a specific address with one property owner.
Everything related to that project lives inside the lead:
- Measurements
- Proposals (bids/estimates)
- Requests
- Invoices
- Notes and status updates
Think of a lead as the central hub for a job from first contact through payment.
Where Leads Are Stored
All leads are stored on the Leads page.
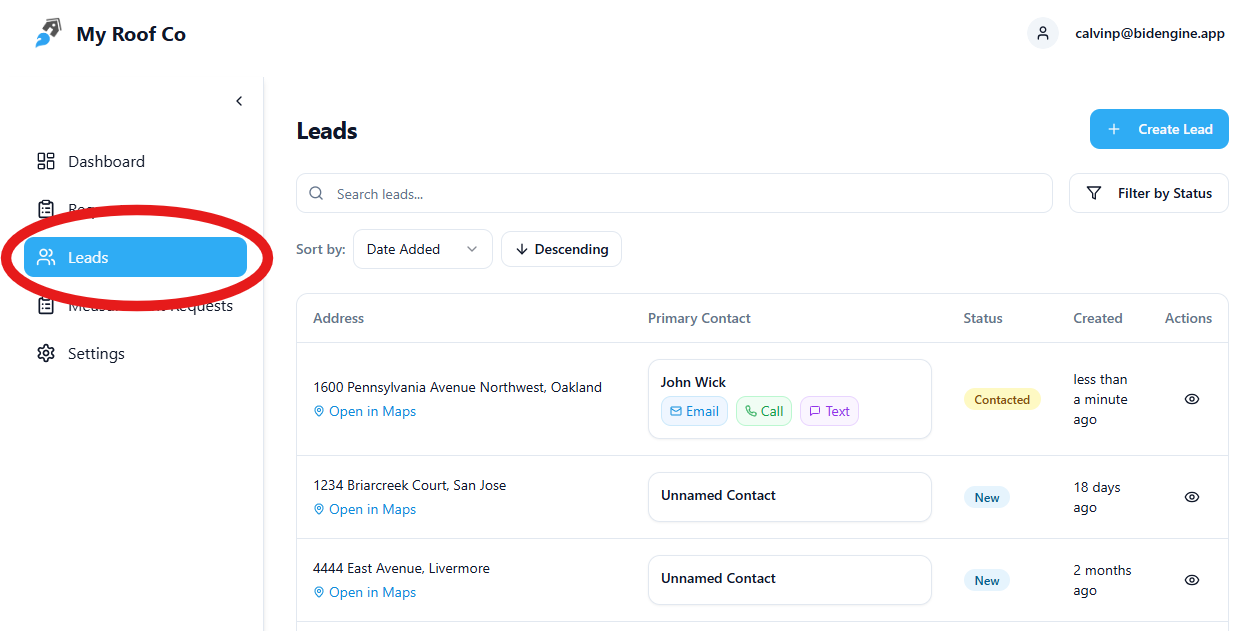
Navigation Path
Navigation Bar → Leads
This page shows your full list of projects and allows you to:
- Search and filter leads
- Track lead status
- Open a lead to view or update details
What Information Is Stored in a Lead?
Each lead includes several core pieces of information:
Lead Info (Main Info Tab)
- Property Address
- Lead Contact
- Name, Email, Phone number
- Lead Source
- Where the lead came from
- Lead Status
- New, Contacted, Qualified, Converted, or Lost
- Lead Notes
- A multiline text field for general context, updates, or reminders
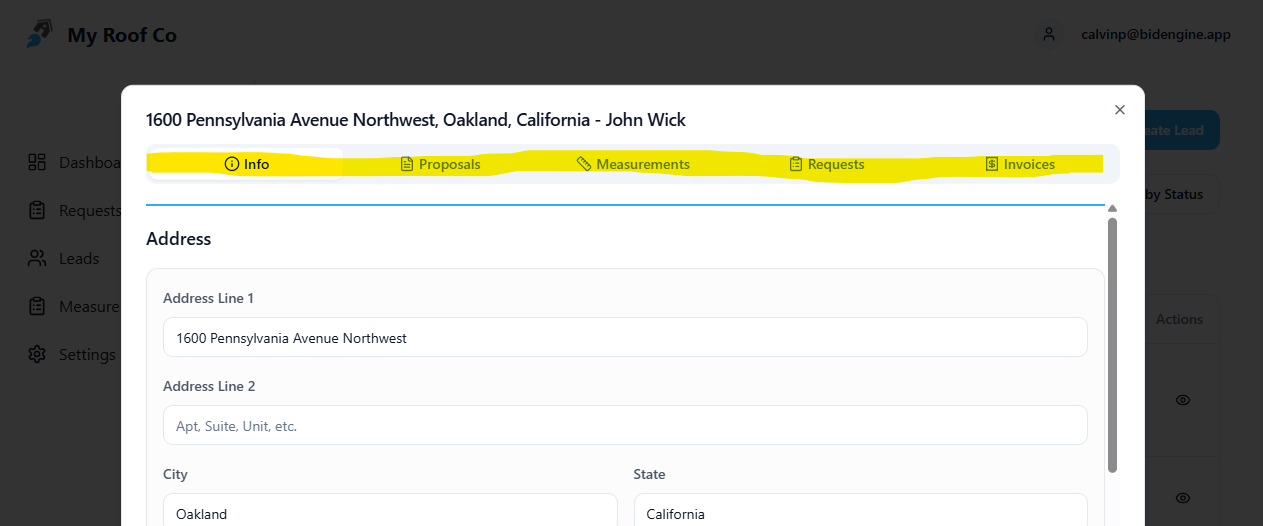
Lead Tabs
Across the top of a lead module, you’ll find tabs for:
- Proposals – all bids created for this project
- Measurements – roof measurements tied to the address
- Requests – measurement and proposal requests submitted to BidEngine
- Invoices – invoices generated for this lead
How to Create a New Lead
There are two ways to create a lead in BidEngine.
Option 1: Create a Lead Manually
- Go to the Leads page
- Click + Create Lead
- On the Lead info page, fill out:
- Property address
- Customer contact info
- Lead source
- Lead status
- Notes
This method is useful if you already have the lead information and want to organize it before requesting measurements.
Option 2: Create a Lead Automatically (Recommended)
Leads are automatically created when you:
- Submit a quick measurement request
- Request a measurement report or proposal from the Dashboard
When you submit a request:
- The address you enter becomes a new lead
- All request activity, measurements, and proposals are stored under that lead automatically
This is the fastest way to move from lead to estimate.
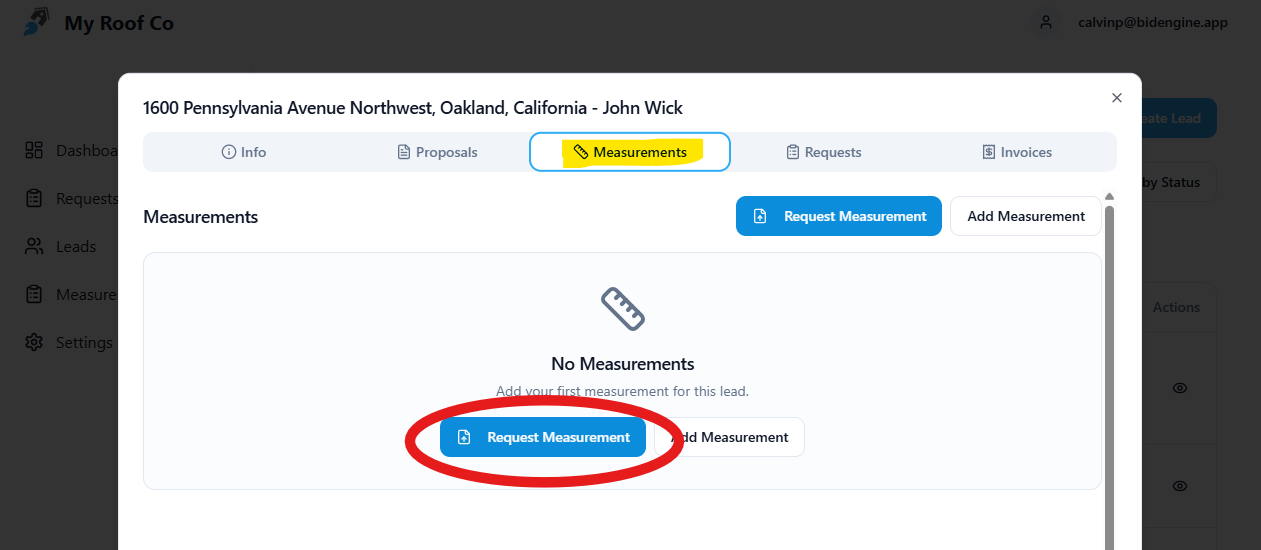
Adding and Managing Measurements on a Lead
Once a lead exists, measurements live under the Measurements tab.
Requesting a Measurement
- Go to the Measurements tab
- Click Request Measurement
- Submit the request as usual
You can track the request status in the Requests tab.
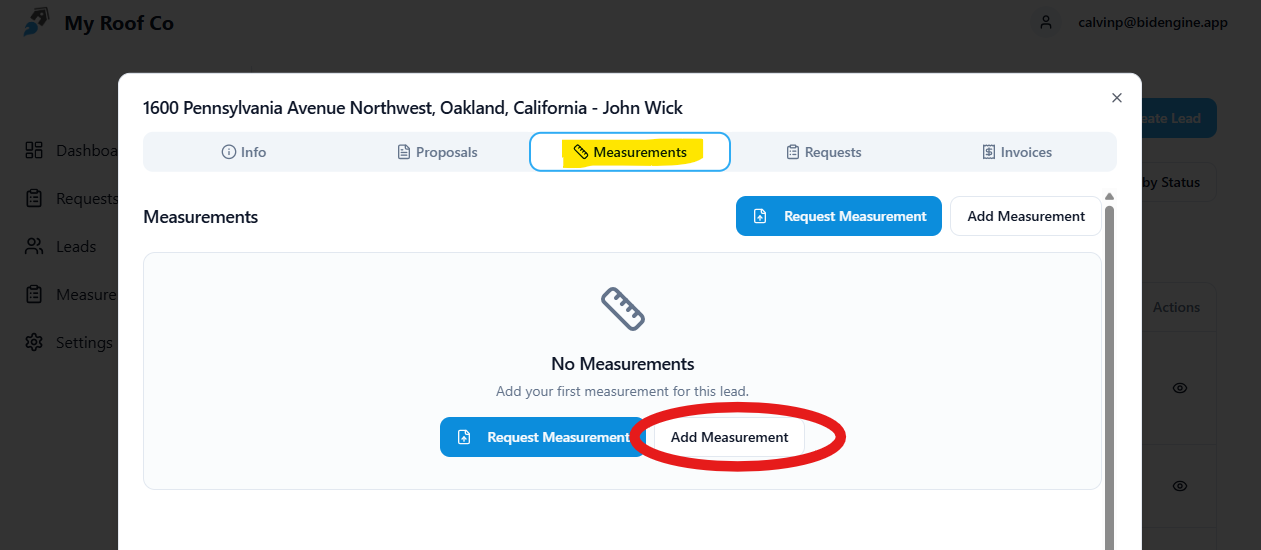
Adding a Measurement Manually
You may want to manually add a measurement if:
- You already have a report from another provider
- You measured the roof by hand
- You want to reuse existing data
Steps:
- Go to the Measurements tab
- Add a new measurement
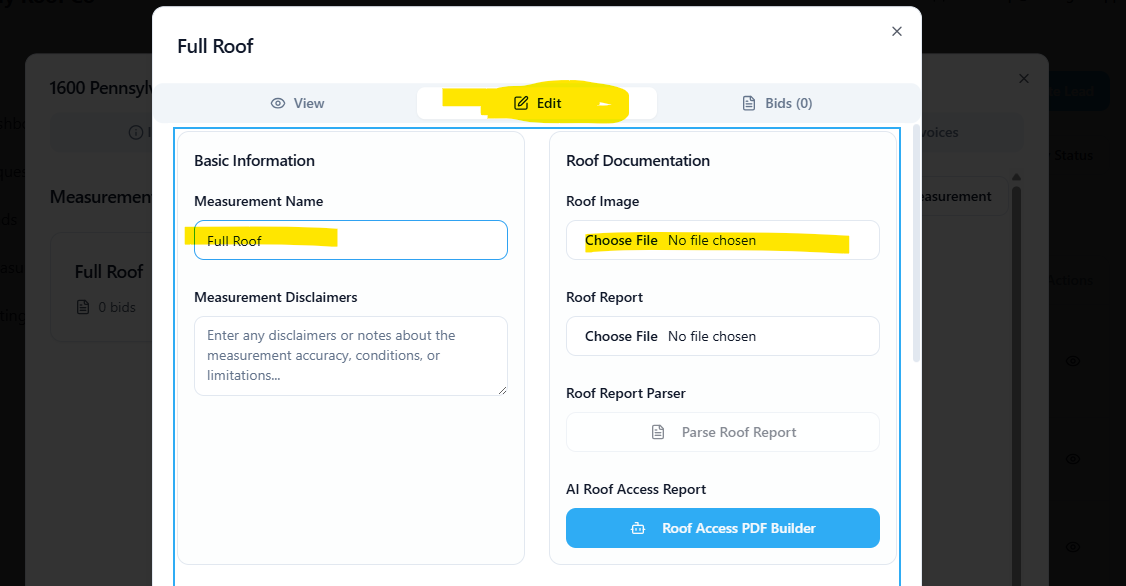
- Name it clearly based on what it includes (e.g. “Main House Only”)
- Click Edit to enter details
Required Measurement Details
- Squares (required)
- Gutters (required if included in the estimate)
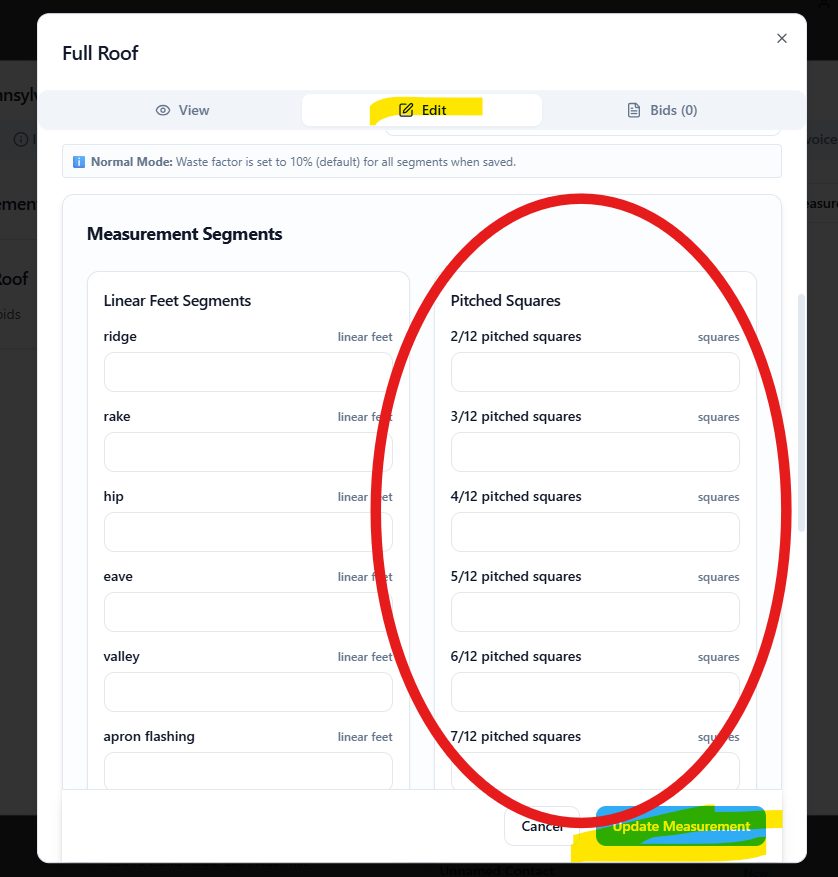
Optional (does not currently affect proposals):
- Linear feet of eaves, rakes, ridges, valleys, hips
You must also upload an image of the roof, such as:
- Satellite screenshot
- Roof report snapshot
- Drone photo
Once saved, the measurement can be used to create proposals.
Viewing Requests for a Lead
The Requests tab shows:
- All measurement and proposal requests submitted for the lead
- Completion status and timestamps
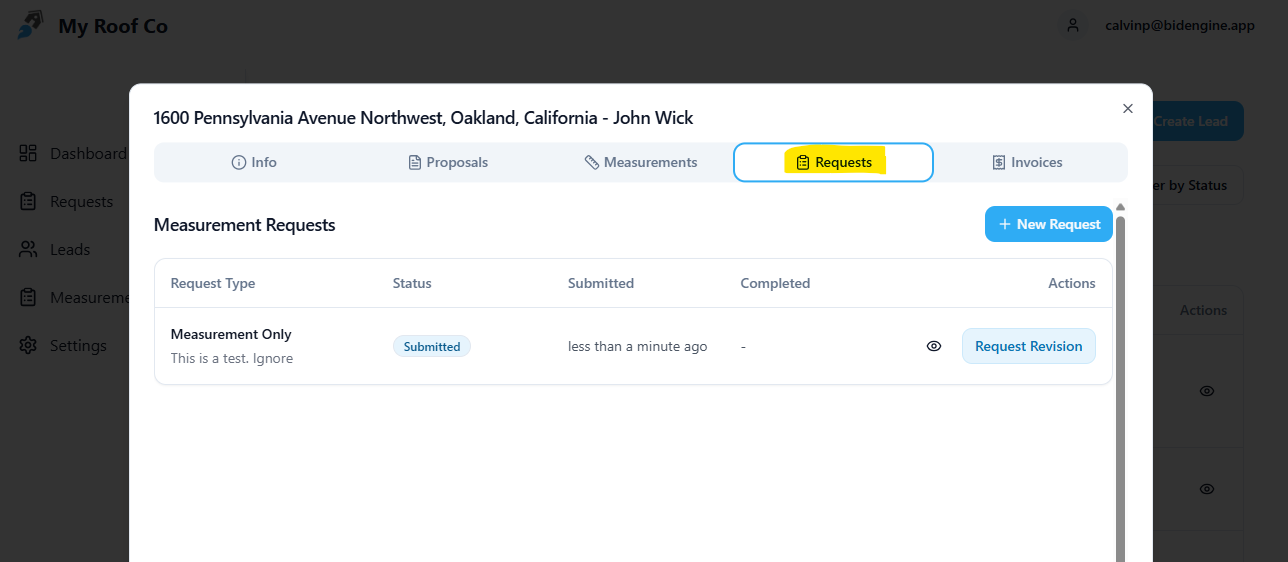
This is also the easiest place to:
- Check if a request is still in progress
- Request a revision to a measurement report
Leaving Notes on a Lead
Lead notes are stored in the Notes field on the main info page.
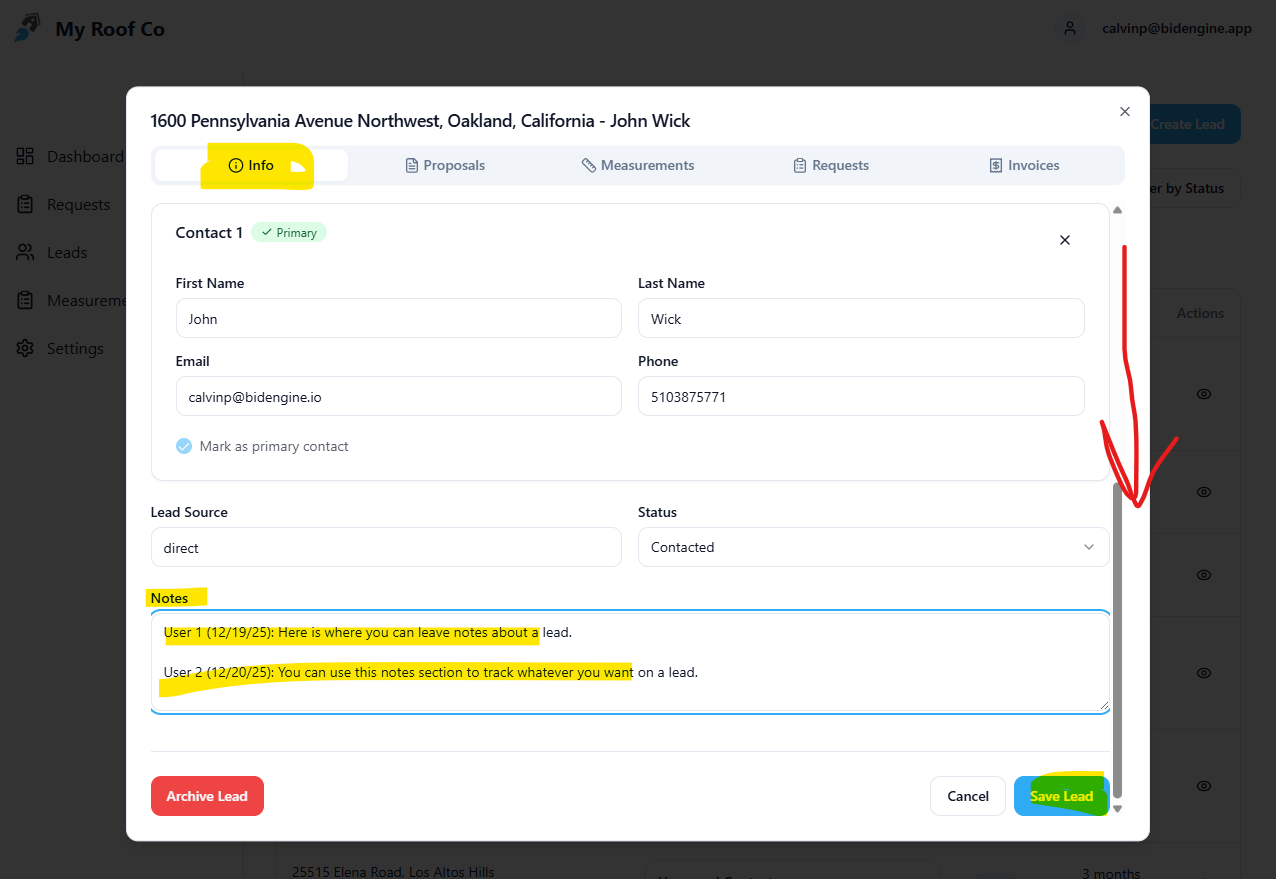
Use notes to track:
- Conversations with the homeowner
- Special conditions or concerns
- Follow-up reminders
- Internal comments for your team
Notes are saved directly to the lead and visible anytime you open it.
Creating Invoices for a Lead
Invoices are typically created after a proposal has been signed and you’re ready to collect payment.
How to Create an Invoice
- Open the lead
- Go to the Invoices tab
- Click + New Invoice
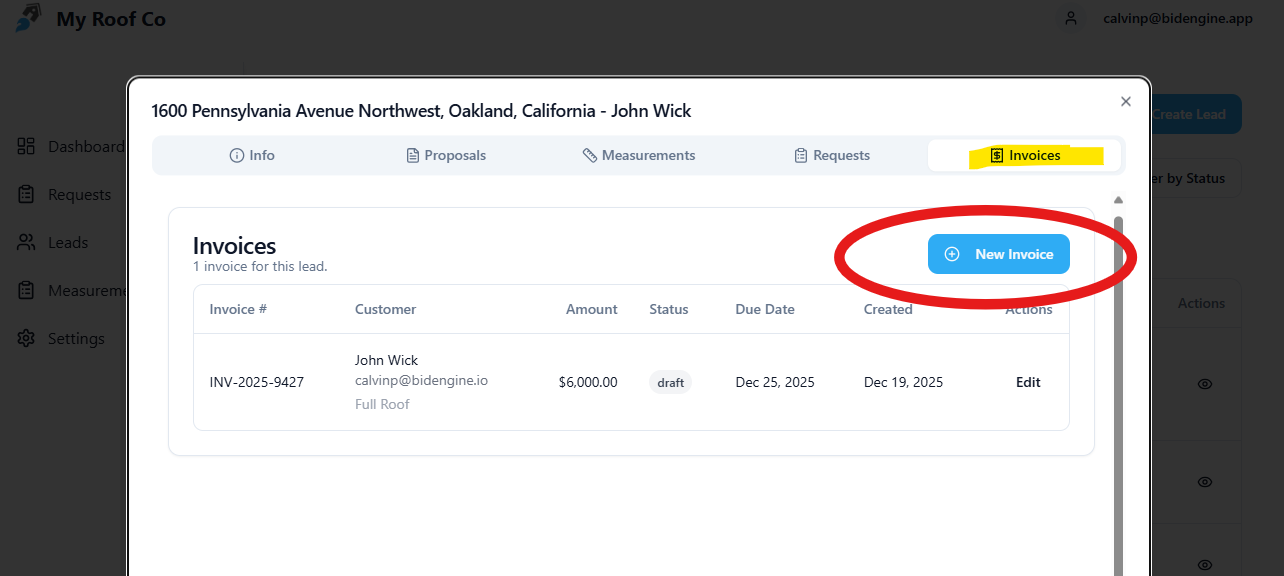
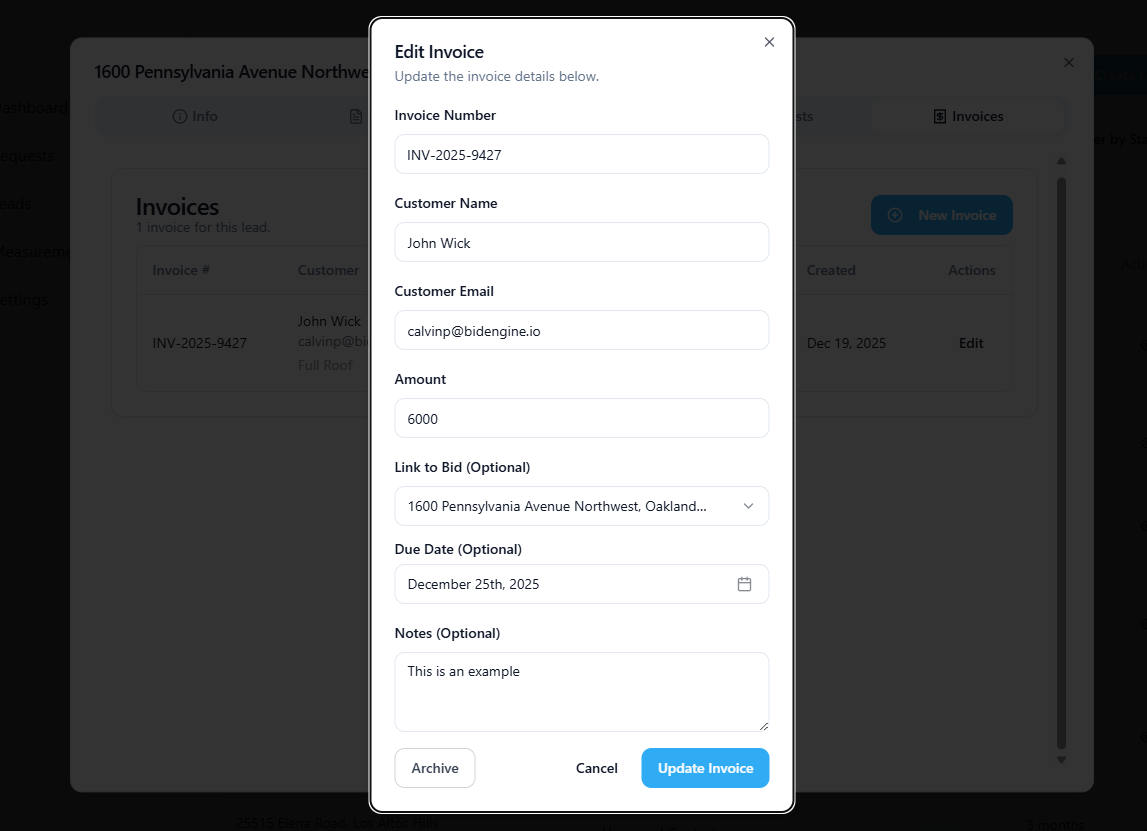
This opens the Edit Invoice module.
Invoice Setup Details
Most fields will be pre-filled, but you must:
- Select the Bid (proposal) the invoice is tied to
- Set the Invoice Amount
- Choose a Due Date
You can also add notes, such as:
- Approved payment methods
- Payment instructions
- Milestone details
Sending or Closing an Invoice
Once created, you can:
- Send the invoice via email using the Send Invoice feature
- Mark the invoice as paid once payment is received
All invoice activity remains attached to the lead for easy reference.
How Everything Works Together
In BidEngine, the workflow is intentionally connected:
- Lead – represents the project
- Measurement – defines the scope and quantities
- Proposal – prices the job using templates and products
- Invoice – collects payment once approved
By keeping everything inside a single lead, BidEngine helps you move faster, stay organized, and convert more estimates into paid jobs.