Getting Started: Setting Up Your BidEngine Contractor Profile

The purpose of this guide is to walk you through the steps to set up your contractor profile in BidEngine so you can get the most out of the platform. We’ll cover the details you should update, the tools available to you, and how each part of the system works.
1. Signing Up
- Visit the BidEngine website.
- Click the Sign Up button in the top-right corner.
- Fill out the required information and click Submit.
- Once your account is created, you’ll be taken directly to your dashboard, where you can immediately begin submitting measurement requests.
2. Update Company and Branding Info
Keeping your company details and branding information up to date ensures that your proposals look professional and accurate.
Update Company Details
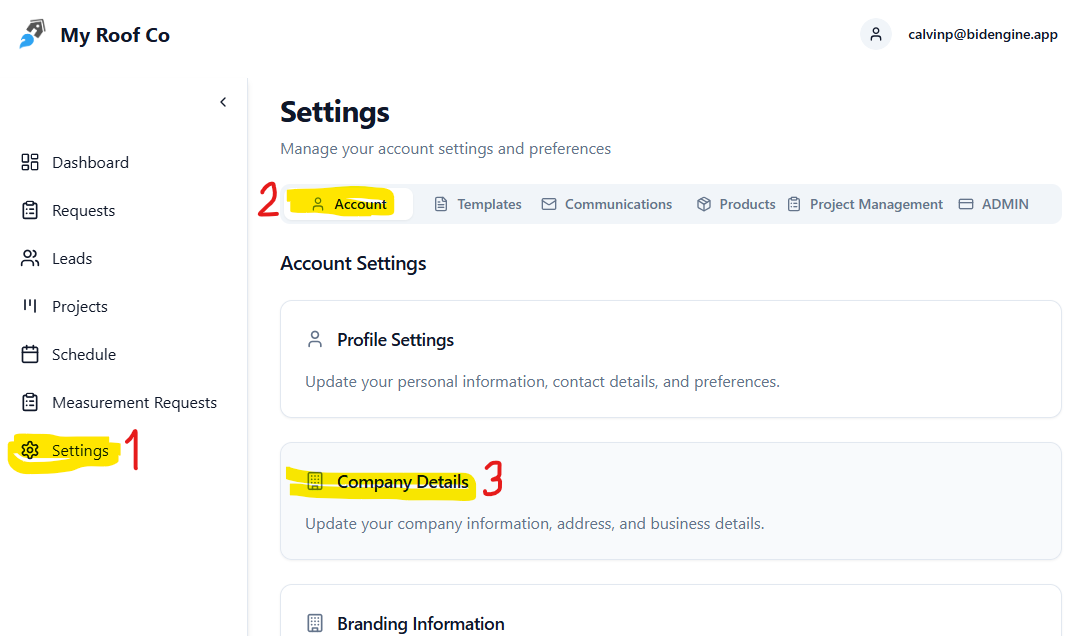
- Navigate to Settings > Account > Company Details.
- Fill out all relevant fields (company name, address, contact info, etc.).
- Click Save.
Update Branding Info
- Go to Settings > Account > Branding Info. This should be located right below the Company Details.
- Update all available branding items:
- Company logo
- Accent color
- License number
- “About Us” description
- Terms and conditions
- Save changes to ensure any proposals you create contain your updated branding.
3. Add Users
If your team will be using BidEngine together, make sure each team member has their own login.
- Go to Settings > Account > User Management. This should be located right below the Branding Information page.
- Click Invite Users to add additional team members.
- Assign permissions based on their role:
Role Permissions
- Admin
- Full access to all requests, leads, settings, and company info.
- Can edit anything.
- Operations
- Can view all requests and leads.
- Can edit most fields except company details and billing settings.
- Rep
- Can only view requests and leads they created or are assigned to.
- Cannot edit company info, billing, settings, or products.
4. Set Up Payment Method
To continue receiving roof reports beyond the free tier, you’ll need to add a payment method.
- Go to Settings > Account > Billing.
- Click Add New Card.
- You will be securely redirected to Stripe to enter your payment information.
- Once saved, your card will be used for all future report purchases.
BidEngine accepts all major credit cards, and all billing is handled through Stripe for security.
If you need to update your billing info or add another card, you can revisit this menu and click "+ Add Credit Card". Make sure you set the new card as your default so payments go through properly.
5. Set Up Products (Optional)
For users looking to create proposals/estimates in BidEngine, updating products and pricing will ensure your proposals are precise and reflect your actual costs. By default, we have some products set up already with industry average pricing. However, you will likely want to customize your product descriptions and pricing to make your proposals stand out more and be priced more accurately for your company.
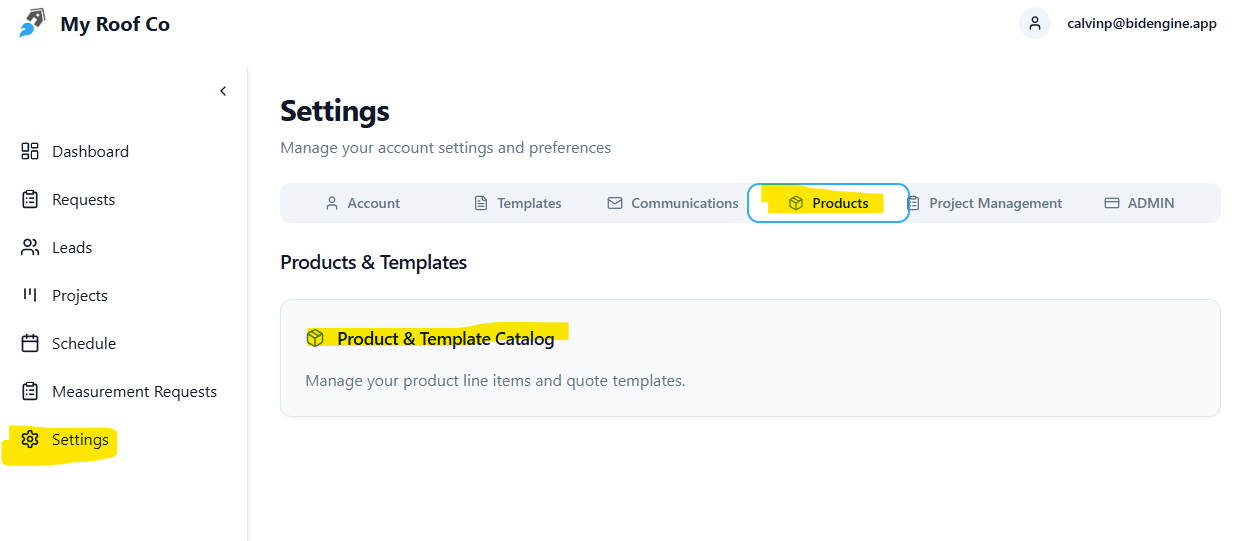
You can find the products by going to Settings > Products > Product & Template Catalogue
For a more complete walkthrough and guide to updating your products and adding new ones, check out our Complete Guide to Setting up Products and Quoting Templates
You're All Set
Once you complete these steps, your BidEngine account is fully configured and ready to use. You now have everything you need to:
- Submit measurement requests
- Generate accurate proposals
- Manage projects
- Collaborate with your team
If you have any questions or need support at any point, feel free to reach out — we’re always here to help.